67-69
TCI Chevrolet Camaro Rear 4-Link Kit
(Coil Over)
Read and understand these instructions before
starting any work
!! SUPPORT VEHICLE WITH JACK-STANDS, BEFORE DOING ANY WORK !!
*APPLY THREAD LOCKING COMPOUND TO APPLICABLE FASTENERS
brackets from the vehicle (Front leaf spring bracket, rear leaf
spring hanger saddle, leaf springs & rear end). When removing
brackets drill out all the factory spot welds and pry the brackets off. (Do
not forcefully remove the bracket as it will damage the sheet metal).
Prepare the rail section making sure that the surface is free from any left
over spot welds or un-even surfaces.
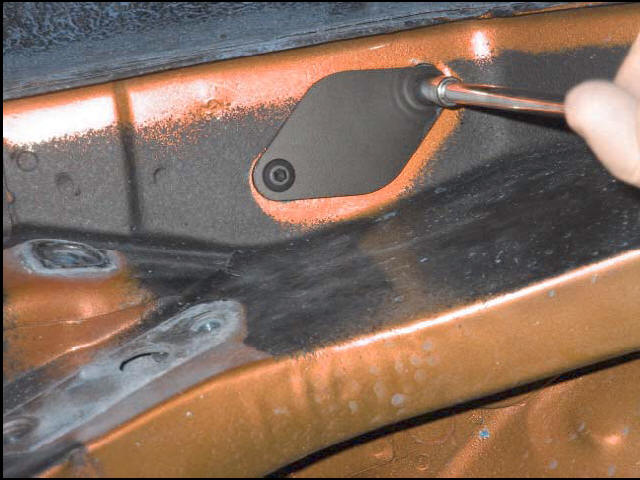
**The TCI Rear 4-link Kit comes equipped with an upper shock block-off
plate. Remove the original upper
shock plate and replace it with the one in the kit. Fasten with the
supplied 5/16-18 x1” Hex Head Bolt.
 2a
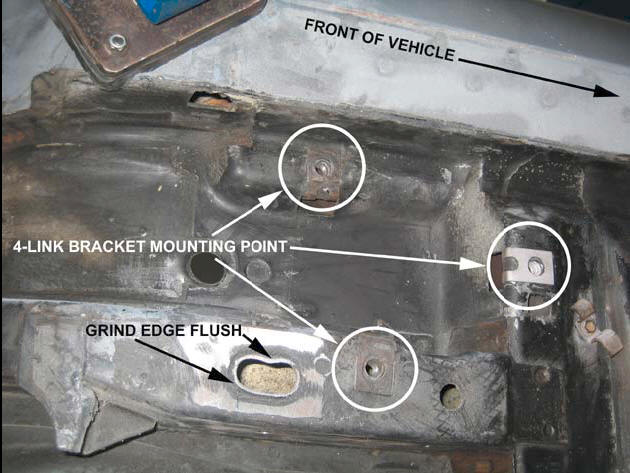
2a2. Using the 3 mounting points on the factory body, mount the 4-link
bracket into position.
 3a
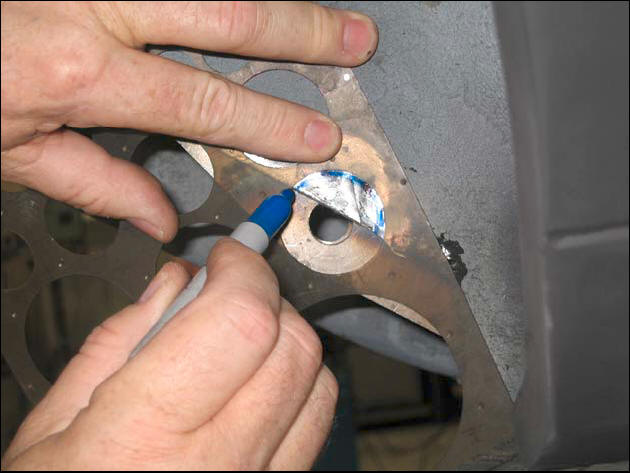
3a3. Once the bracket is in position, mark the lower 4-Link bar mounting
hole so that the sheet metal won’t interfere with the fastener. Scribe a 1
1/2” diameter mark & trim to make sure the bolt and washer will clear
the sheet metal.
4. Once the bracket is positioned in place take a reference measurement to
any body hole (ie. The rear most mounting point hole for the front clip;
and duplicate measurement for the other bracket) Referencing more
than one point will result in a more accurate measurement. This will
ensure that the 4-link bracket is mounted in the same location on the unibody.
 5a
5a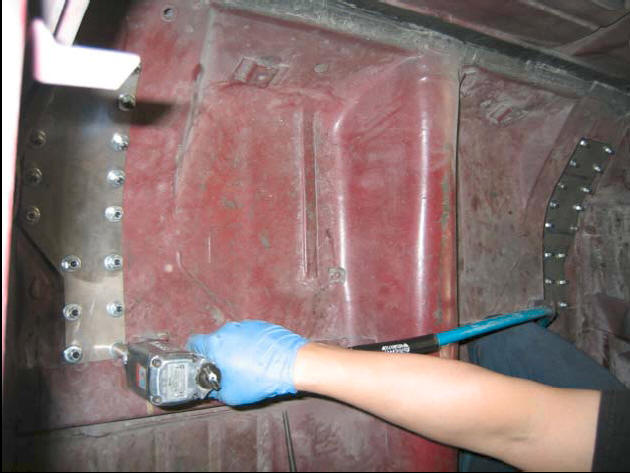 5b
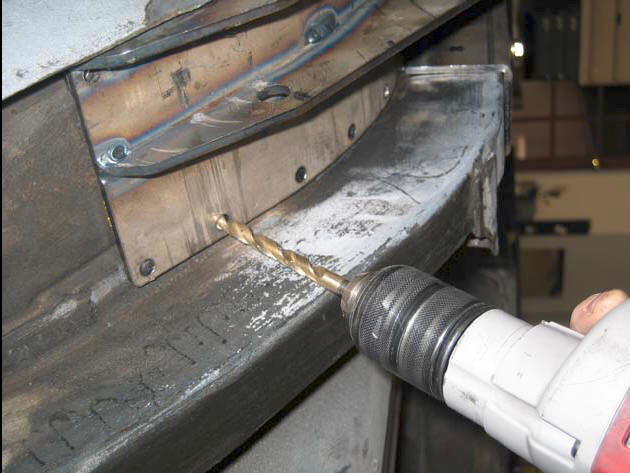
5b5. With this next step, acquiring extra help will make the install a lot
simpler. Using a 5/16” drill bit start by drilling & tightening the supplied
5/16-24 x 1 1/4” Button Head Bolt; 5/16” Flat Washer; 5/16-24 Full
Height Nylox through the Uni-body one at a time (From front to rear of
vehicle) and position the re-enforcement plate in place. Doing this will
make sure that the bracket will sit evenly on the mounting surface. After
all the bolts are inserted into the bracket began tightening the bolts
starting from the front and working towards the rear of the car.
 6a
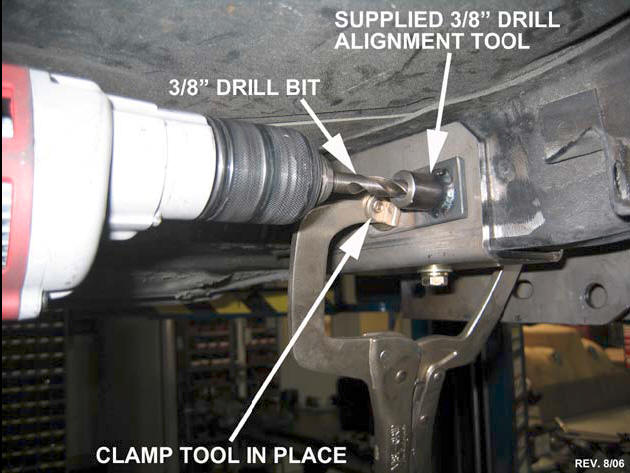
6a6. Next, using a 3/8” drill bit with the supplied drill guide tool, drill
through the uni-body.
 7a
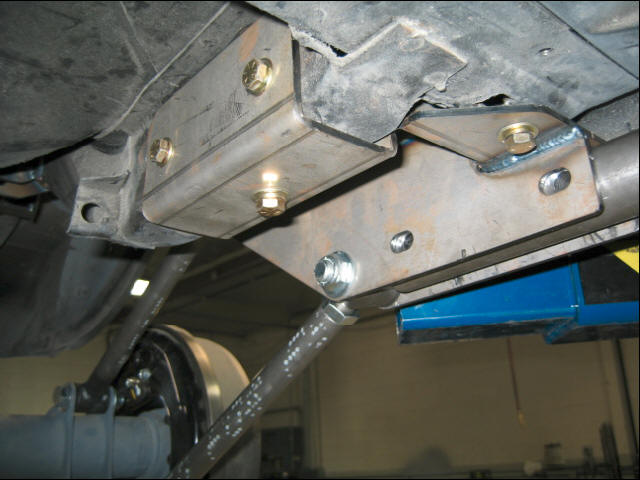
7a7. Install the supplied 3/8-24 x3 1/2” Hex Head Bolts; 2 3/8” Flat Washers;
3/8-24 Full Height Nylox Nuts.
 8a
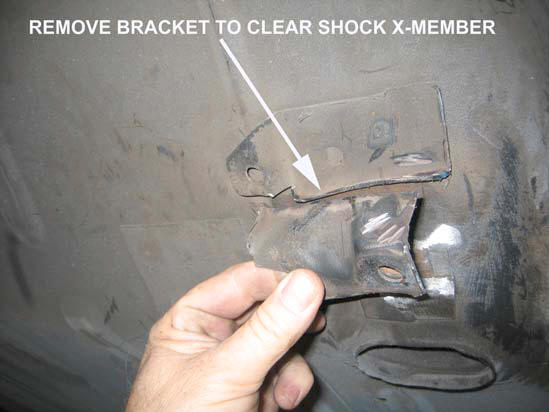
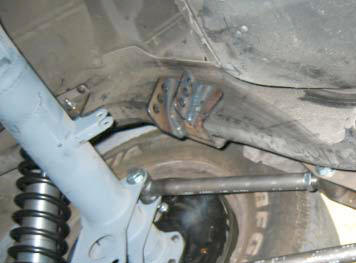
8a8. Prep the area where the Cross-member will be installed. There is a
bracket that will need to be cut-off in order to clear the Cross-Member
tube.
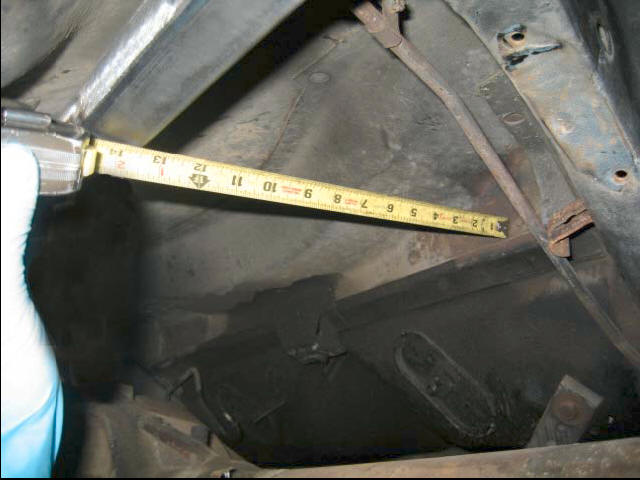 67a
67aTake a measurement from the body panel to the front edge of the shock
Cross-member (See photo 67a). This measurement should be 13 3/16”.
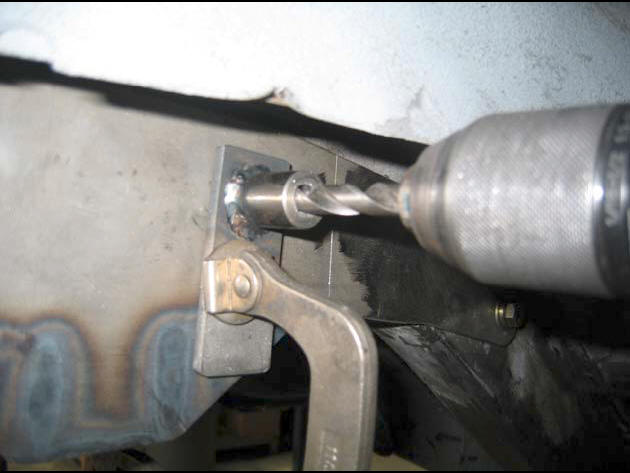
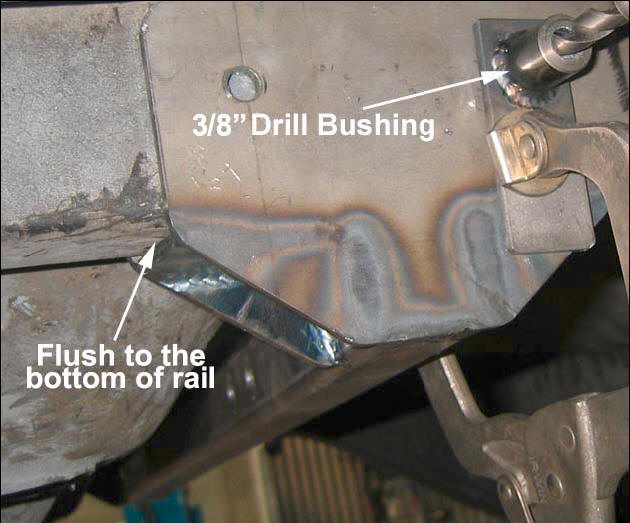 67b
67bMake sure that the shock Cross-Member is mounted flush to the bottom of
the rail. Once the shock Cross-Member is in position clamp each side of the
bracket to avoid movement of the Cross-Member. The TCI rear 4-Link kit
comes with a 3/8” drilling guide, using a 3/8” drill bit, drill horizontally
through the uni-frame using the outer Cross-Member plate as a reference.
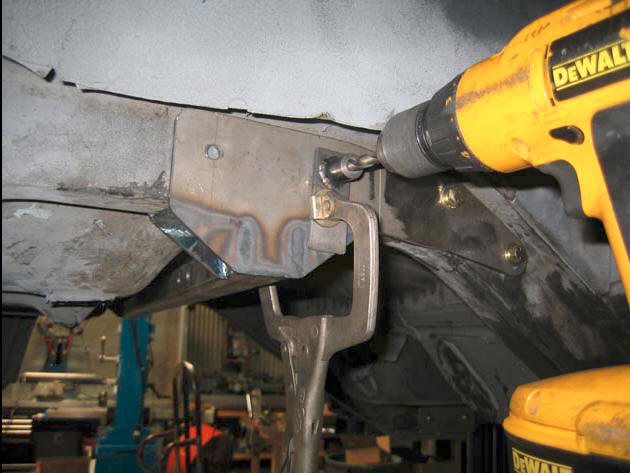
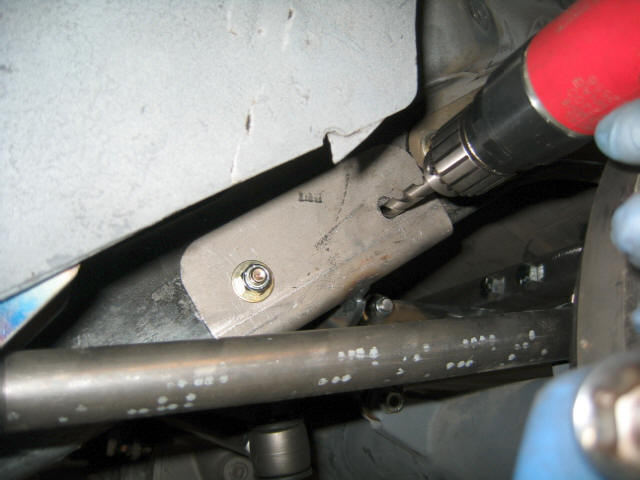
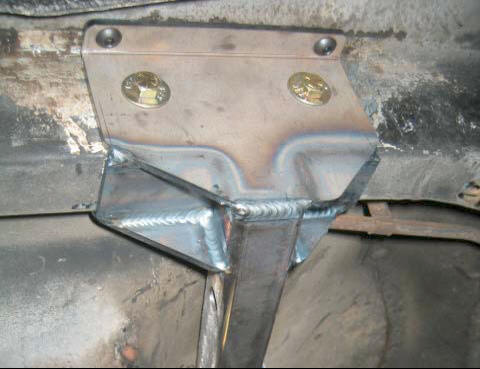 67c
67cUsing a 5/16” drill bit, drill vertically through the Uni-body.
Before doing the final installation of the shock Cross-Member it’s
necessary to pre-install the Rear Sway Bar Housing onto the Rear
Shock X-Member.
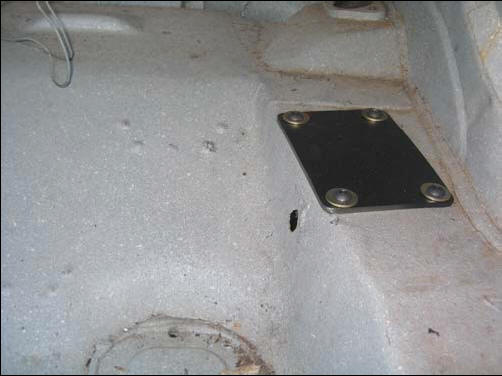 67d
67dInstall the re-enforcement plate in the trunk and tighten all of the fasteners to
the recommended torque specs.
 9a
9a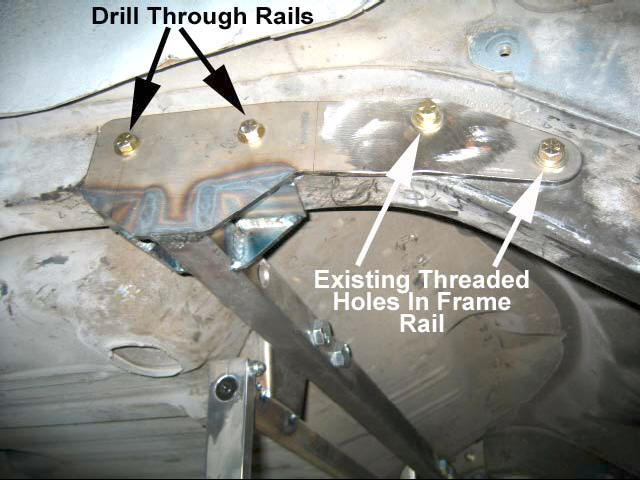 9b
9bBefore doing the final installation of the shock Cross-Member it’s
necessary to pre-install the Rear Sway Bar Housing onto the Rear
Shock X-Member.
9. The shock Cross-Member is located using the existing threaded holes on
the frame as shown in the photos. Make sure that the shock Cross-
Member is mounted flush to the bottom of the rail. Using a 3/8” drill
bit, drill horizontally using the outer Cross-Member plate as a guide.
Then, using 5/16” drill bit, drill through the Uni-body to attach the
remaining bolt hole’s of the Cross-Member into place.
 10a
10a 10b
10b10. Install the splined bar to the rear sway bar housing; nyliner bushing;
shim and aluminum arm in the order shown.
 11a
11a11. Drill horizontally through the rail using the supplied drilling tool.
 12a
12a12. Mount the 4-Link bars into place, making sure that the shorter bar goes
on the upper hole and that the longer bar goes in the lower hole. 4-Link
bar adjuster is positioned towards the 4-link bracket side. Use the
supplied 5/8-18 x3” Hex Head Bolts; 2 5/8” Flat Washers; 5/8-18 Full
Nylox Nuts.
 13a
13a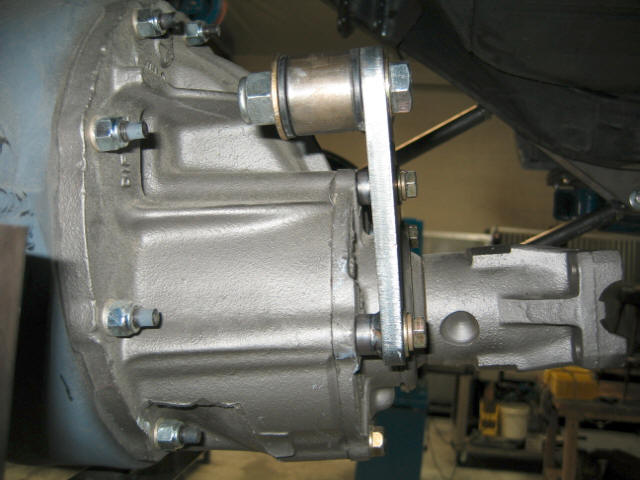 13b
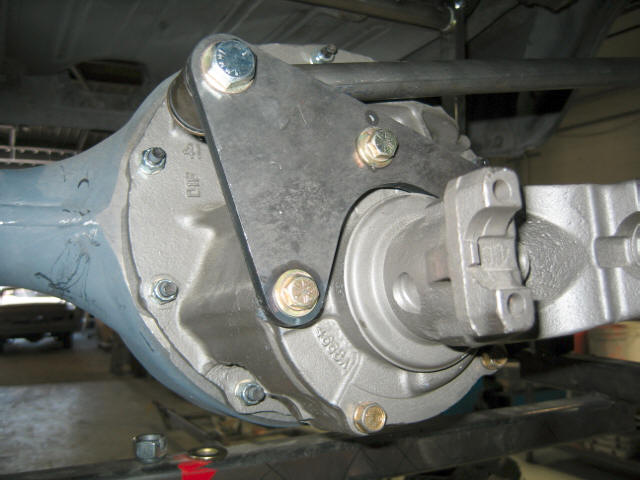
13b13. Next, pre-install the rear panhard bracket (3rd member) to the rear end
making sure that it is aligned according to the photo shown. Using the 3
supplied 3/8-16 x1 3/4; 3/8”bolts, Lock Washers and 3/8” Flat Washers.
After the panhard bracket is installed you may begin to install the rear
panhard bar to the rear end.
 14a
14a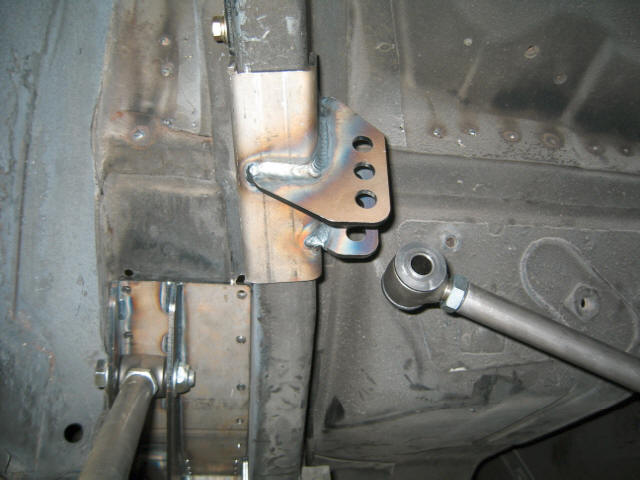 14b
14b14. Next raise the rear end so that the lower 4-link bar is about level to the
floor. Bolt on the panhard bar to the 3rd member bracket with the
supplied 7/8-18 x3” Hex Head Bolts; 2 7/8” Flat Washers; 5/8-18 Full
Nylox Nuts. Next, position the frame side panhard bracket making sure
that there is no binding present to the bracket.
 15a
15a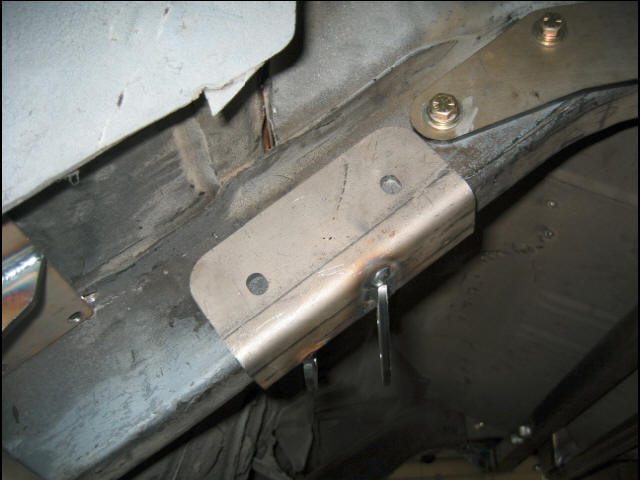 15b
15b15. Using the supplied drill guide, drill horizontally using a 3/8” drill bit.
 16a
16a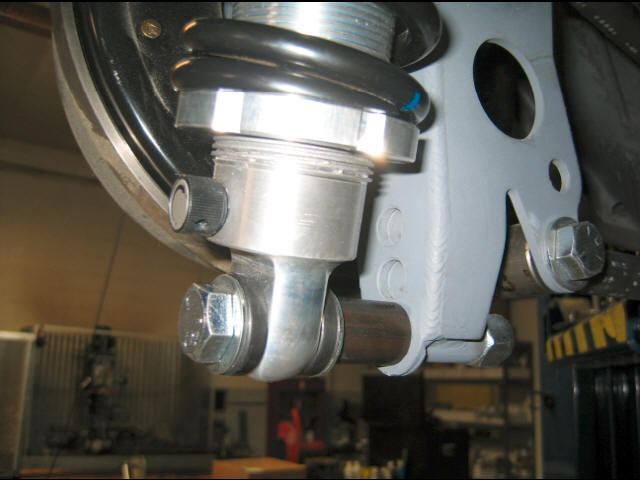 16b
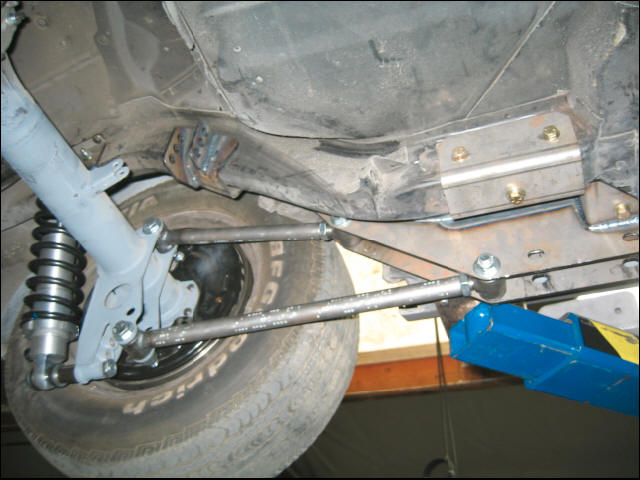
16b16. Next, mount the shock to the Rear Shock Cross-Member making sure
that the shock adjustment dial is pointing down and back towards the
rear of the vehicle. Complete the install by mounting the shock to the
rear end.
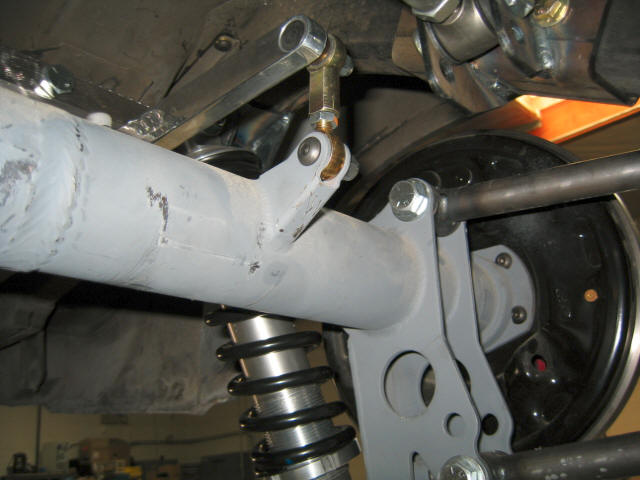 17a
17a17. Complete installation by connecting the Upper sway bar arm to the rear
end with the supplied rod end.
* Install axle bracket center-center 44 1/4” C-C 1 1/2 degree Pinion down. Rear
sway bar housing tab center-center 30 1/4”. If necessary axle brackets may be cut to
be installed on an existing rear end. (See template)
SUPPLIED 3/8” DRILL ALIGNMENT
TOOL