|
|
||||||
|
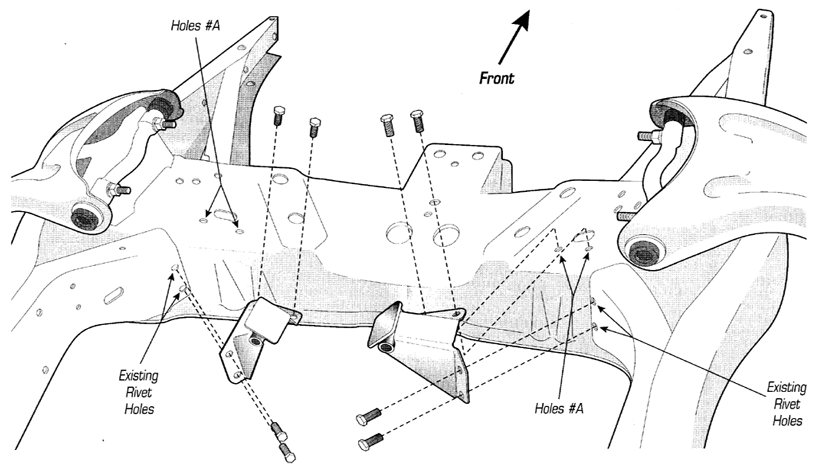
BOLT -ON APPLICATION, NO WELDING Locates engine forward ľ” in order to clear some intake systems and HEI (big cap) distributor. Permits late model engine (with side mounts) upgrades.
1.Remove the original engine and transmission (including stock motor mounts) from car. 2.Grind off the rivet head in the rear side of the crossmember marked existing rivet holes on the drawing. 3.Punch rivet body through the crossmember, leaving a hole and drill it to 3/8”. 4 Bolt-on TCI motor mount into the crossmember, with the bolt supplied, in the rivet holes. tighten bolts and do not drill any holes at this time. 5.Due to inconsistency in the original frame and fron crossmember, a slight fitting to these motor mount should be made as follows:
6.Drill 3/8” holes on the top of the crossmember (holes #A), using the holes on the front side of the motor mount as a template. 7.Install bolts on these holes and tighten. 8.Double check alignment and measurement and install engine using a new rubber mount. TCI #6650. 9.A new transmission mount should be installed (available from TCI) |
||||||
 |
||||||
|
|